Maintaining Utility Meters

Menu

Property > Meter

Mandatory Prerequisites

Prior to creating a Utility Meter, refer to the following Topics:

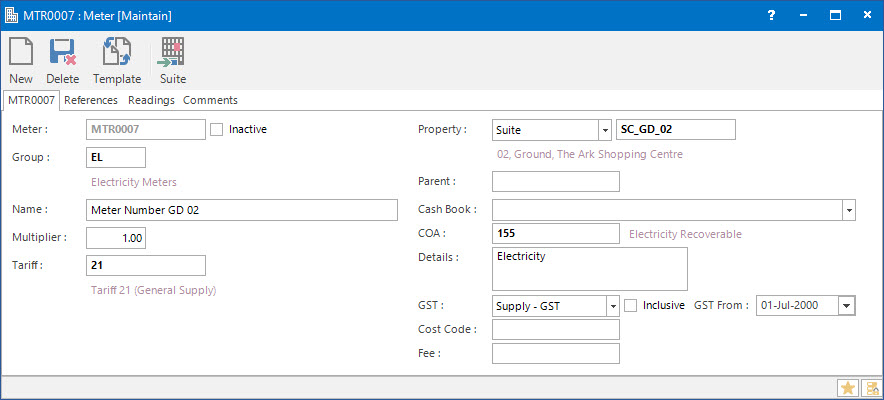
Screenshot and Field Descriptions: Utility Meter Tab


Meter: this is the primary identifier for the Meter.


Inactive: this check box determines whether or not the Meter record is in use.


Group: this determines the Group that the Meter belongs to. Groupings are useful in searches and reports.


Name: this is the friendly name given to the Meter.


Multiplier: this is the Multiplier amount which is applied to the usage for the period.


Tariff: this is the Utility Tariff attached to the Meter.


Property: this is the Property to which the Meter is attached.


Parent: this is the Parent meter to which this Meter record can be attached to as a child meter.

If a Meter is attached to a Parent Meter, the Cash Book, COA, Details, GST, Cost Code and Fee fields cannot be edited, as the information will be used based on the set up of the Parent Meter.

Cash Book: this is the Bank account if the transactions raised are going to be a Cash Sales / Cash Credit type transaction. Leave blank if a Invoice / Credit Note type transaction is to be raised.


COA: this is the Chart of Account for the transactions to be raised.


Details: this is the description for the transactions. It will default to the value set up for the COA.


GST: this is the GST Type for the transactions. It will default to the type set up for the COA.

Inclusive: this check box determines if the Amount includes GST. If this field is ticked, when the GST is calculated, the Amount will be reduced by the GST and the tick will disappear to reflect that the line no longer includes GST. If this check box is not ticked, the Amount will not be reduced and the GST will be calculated normally.

GST From: this is a historical field and current use is now irrelevant. It was used during the implementation of GST to allow contractual date based transactions to escape full GST. There may be old transactions on the system to which the rule applied.

Cost Code: this is the cost centre that the amounts relate to. This field can be set as optional, mandatory or not required on the COA set up screen.


Fee: this field can be used to add an extra administration fee to the transaction that is raised.

Screenshot and Field Descriptions: Readings Tab


The Readings tab on the Utility Meter screen lists out the past meter readings.


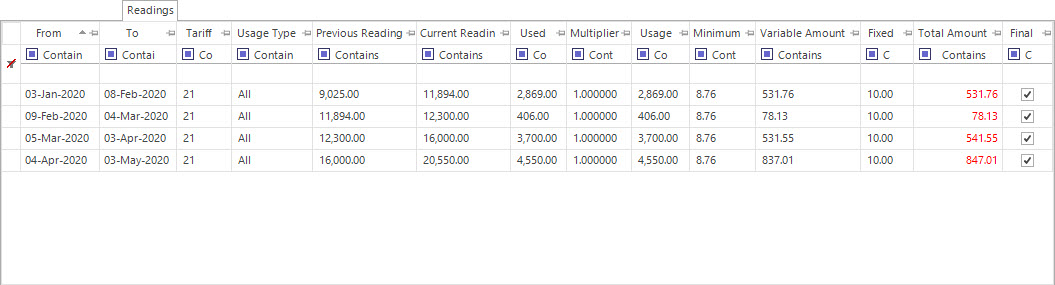
Readings table: this contains rows of meter readings recorded for the period.

Shared or Site Optional Tabs

Other than Tabs described specifically in this Topic, the following may also be available (depending on Site Settings):

How Do I : Add a new Meter

  1. In the Meter field, enter a new Meter ID.
  2. At the Group field, locate the Meter Group you would like to assign this Meter to.
  3. In the Name field, enter the name of the Meter.
  4. Select a Tariff to attach the Meter to.
  5. Select a Property to attach the Meter record to.
  6. A Meter can also be attached to a Parent Meter by selecting a meter record in the Parent field.
  7. Select the required Cash Book and COA for the Meter.
  8. The Details field gets populated with the COA details based on the COA that is selected for the Meter.
  9. Select the GST, select the required GST type for the Meter.
  10. Tick the Inclusive check box if the Amount field will include GST. Otherwise the GST component will be calculated and added separately.
  11. The GST From date will default to the value set up for GST.
  12. At the Cost Code field, select the required Cost Code for the Meter.
  13. At the Fee field, if required, enter the administration fee that should be charged on top of the amount raised.
  14. Switch to the References tab, and if there are fields available, enter any additional information required.
  15. Switch to the Comments tab, and enter any additional comments relating to the Meter.
  16. Click the Application tool-bar push button: Add.
  17. Confirm that you wish to add the new record.

How Do I : Modify an existing Meter

  1. At the Meter field, locate the Meter.
  2. At the Group field, change the Meter Group you would like to assign this Meter to.
  3. At the Name field, change the name of the Meter.
  4. At the Tariff field, change the Tariff to attach the Meter to.
  5. At the Property field, change the Property to attach the Meter record to.
  6. At the Parent field, change the Parent Meter that this Meter is linked to.
  7. At the Cash Book field, change the required Cash Book for the Meter.
  8. At the COA field, change the required COA for the Meter.
  9. The Details field gets populated with the COA details based on the COA that is selected for the Meter.
  10. At the GST field, change the required GST for the Meter.
  11. Tick the Inclusive check box if the Amount field will include GST. Otherwise the GST component will be calculated and added separately.
  12. The GST From date will default to the value set up for GST.
  13. At the Cost Code field, change the required Cost Code for the Meter.
  14. At the Fee field, if required, change the administration fee that should be charged on top of the amount raised.
  15. Switch to the References tab, and if there are fields available, enter any additional information required.
  16. Switch to the Comments tab, and enter any additional comments relating to the Meter.
  17. Click the Application tool-bar push button: Change.
  18. Confirm that you wish to change the record.

How Do I : Delete an existing Meter

  1. At the Meter field, locate the Meter.
  2. Click the Application tool-bar push button: Delete.
  3. Confirm that you wish to delete the record.

A Meter record can only be deleted if there are no other records associated with it, such as a Parent Meter.

Related Topics

Utility Meters are associated with the following Topics: